VCF 9.1 Protection and Recovery: Deploy, Configure, and Protect Your VMs with vSAN ESA Snapshots — No License Required
VCF 9.1 merges Live Site Recovery, vSphere Replication, and vSAN Data Protection into a single Protection and Recovery appliance. Local vSAN snapshots work out of the box with no additional license. Here is the complete deployment, configuration, and protection group walkthrough.
Three Appliances Become One
If you have been running VMware Live Site Recovery, vSphere Replication, and vSAN Data Protection as separate appliances, VCF 9.1 just simplified your life. The new Protection and Recovery appliance (v9.1.0.0200, build 25525235) merges all three into a single unified virtual appliance — one OVA to deploy, one management interface to operate, one place to manage local snapshots, replication, and disaster recovery.
The consolidation is more than cosmetic. Instead of maintaining three separate appliances per site — each with its own lifecycle, certificates, and resource footprint — you now deploy one appliance that handles everything. Fewer moving parts, fewer updates, fewer things that can break at 2 AM.
And here is the part that matters most for day-to-day operations: local vSAN snapshots require no additional license. Deploy the appliance, configure it with vCenter, create a protection group, and your VMs are protected with scheduled snapshots — all included with your existing vSAN ESA cluster. No subscription upgrade needed for operational recovery.
Advanced capabilities like cross-site replication, disaster recovery orchestration, and ransomware recovery are available with the Advanced Cyber Compliance subscription. But for organizations that want a solid operational recovery baseline — protection against accidental deletions, misconfigurations, or corrupted updates — the local snapshot capability is ready to use the moment the appliance is configured.
What the Appliance Includes
The Protection and Recovery appliance ships as a single OVA that bundles three engines: the Protection and Recovery server (formerly Live Site Recovery), vSphere Replication, and vSAN snapshots and replication. The system requirements are modest — 8 vCPUs, 24 GB RAM, 5 hard disks totaling approximately 800 GB, and a 1 Gbit network adapter.
You deploy one appliance per vCenter. If you need to scale beyond 5,000 protected VMs or operate in fan-in / fan-out topologies with shared sites, you can deploy up to nine additional scale-out appliances (4 vCPU, 8 GB RAM, ~110 GB disk each). The scale-out appliances carry only the Protection and Recovery server component.
The capability split is clean. Local vSAN snapshots — which provide operational recovery through scheduled, policy-driven snapshots stored on the same vSAN datastore — are ready to use after appliance setup with no license required. They run on any vSAN ESA cluster. Replication (cross-site data protection), disaster recovery (automated failover and recovery plans), and ransomware recovery fall under the Advanced Cyber Compliance subscription.
Deploying the Appliance
VCF 9.1 gives you two deployment paths: the traditional OVF wizard and a new streamlined deployment directly from the vCenter UI. Both get you to the same result.
Option 1: Deploy from the vCenter UI (New in 9.1)
This is the fastest path. In vCenter, navigate to your cluster, open Configure > Protection and Recovery > Deployment. The page shows two capability tiers side by side — Local vSAN Snapshots (Operational Recovery, ready to use after setup) and the advanced protection suite (Replication, Disaster Recovery, Ransomware Recovery — requires Advanced Cyber Compliance).
Click Deploy and configure Protection and Recovery appliance to launch the deployment wizard. Define your deployment resources, configure network settings (IP address or FQDN), and set the mandatory admin and root passwords. The appliance deploys directly into your cluster.
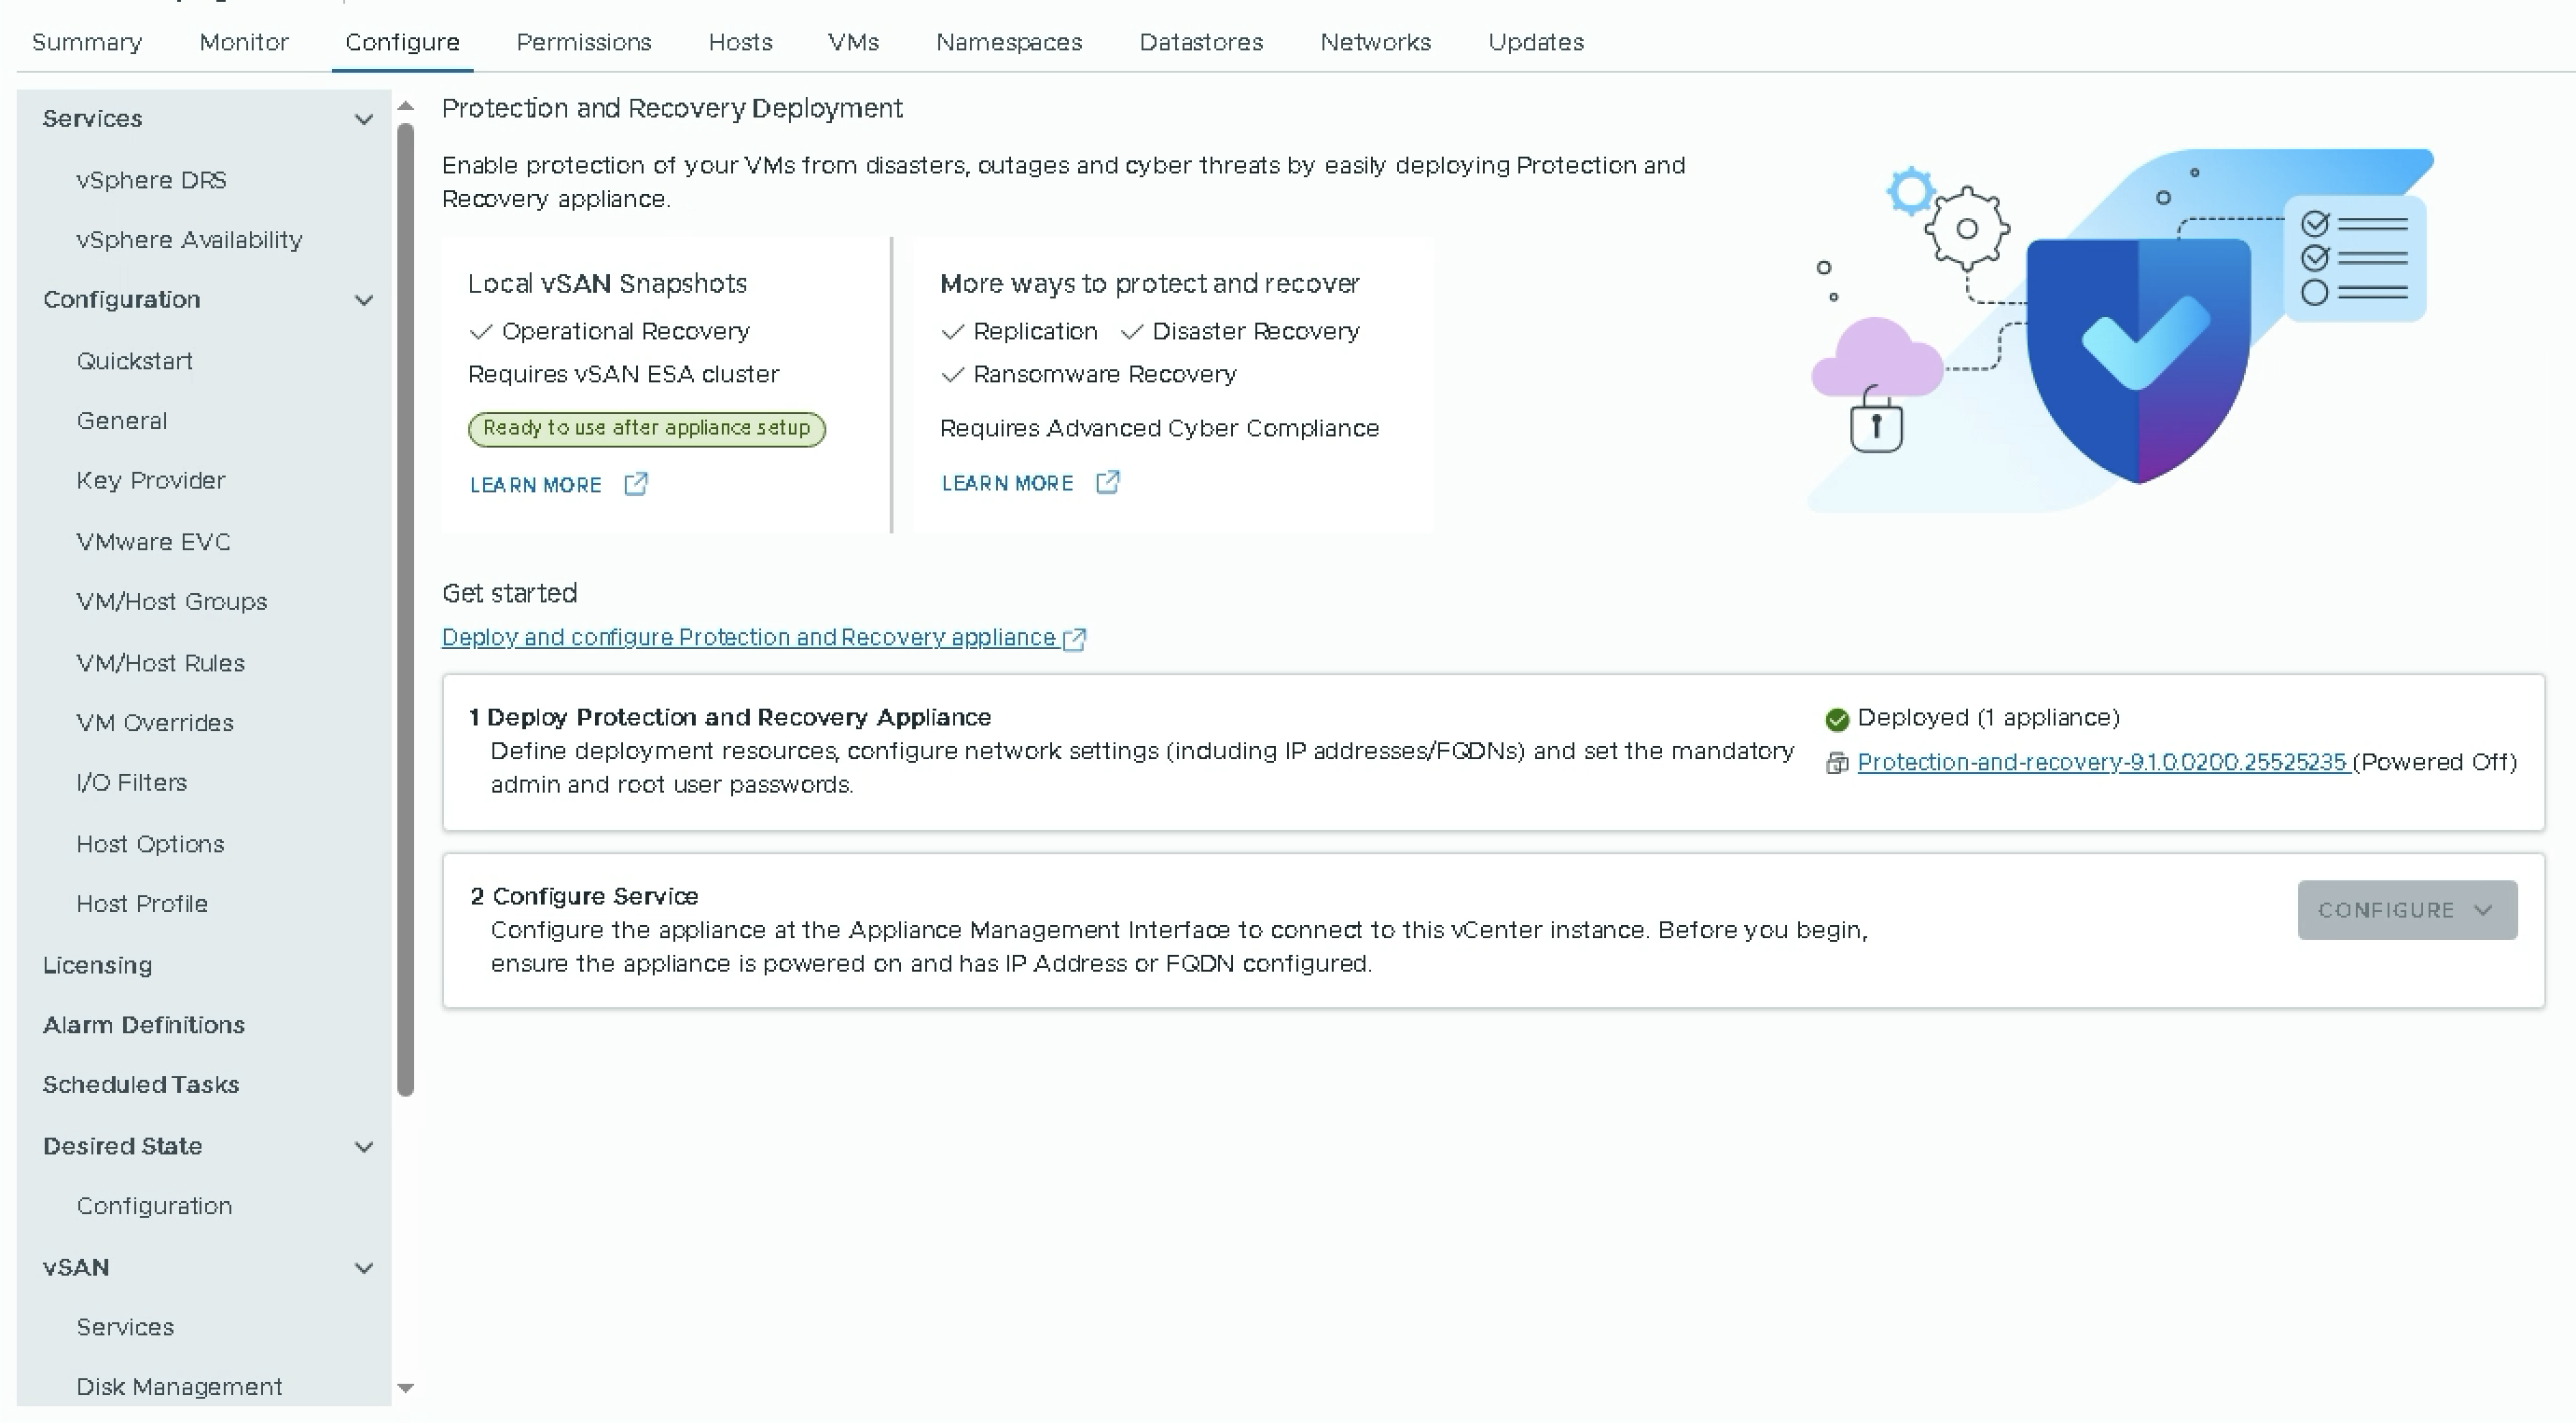
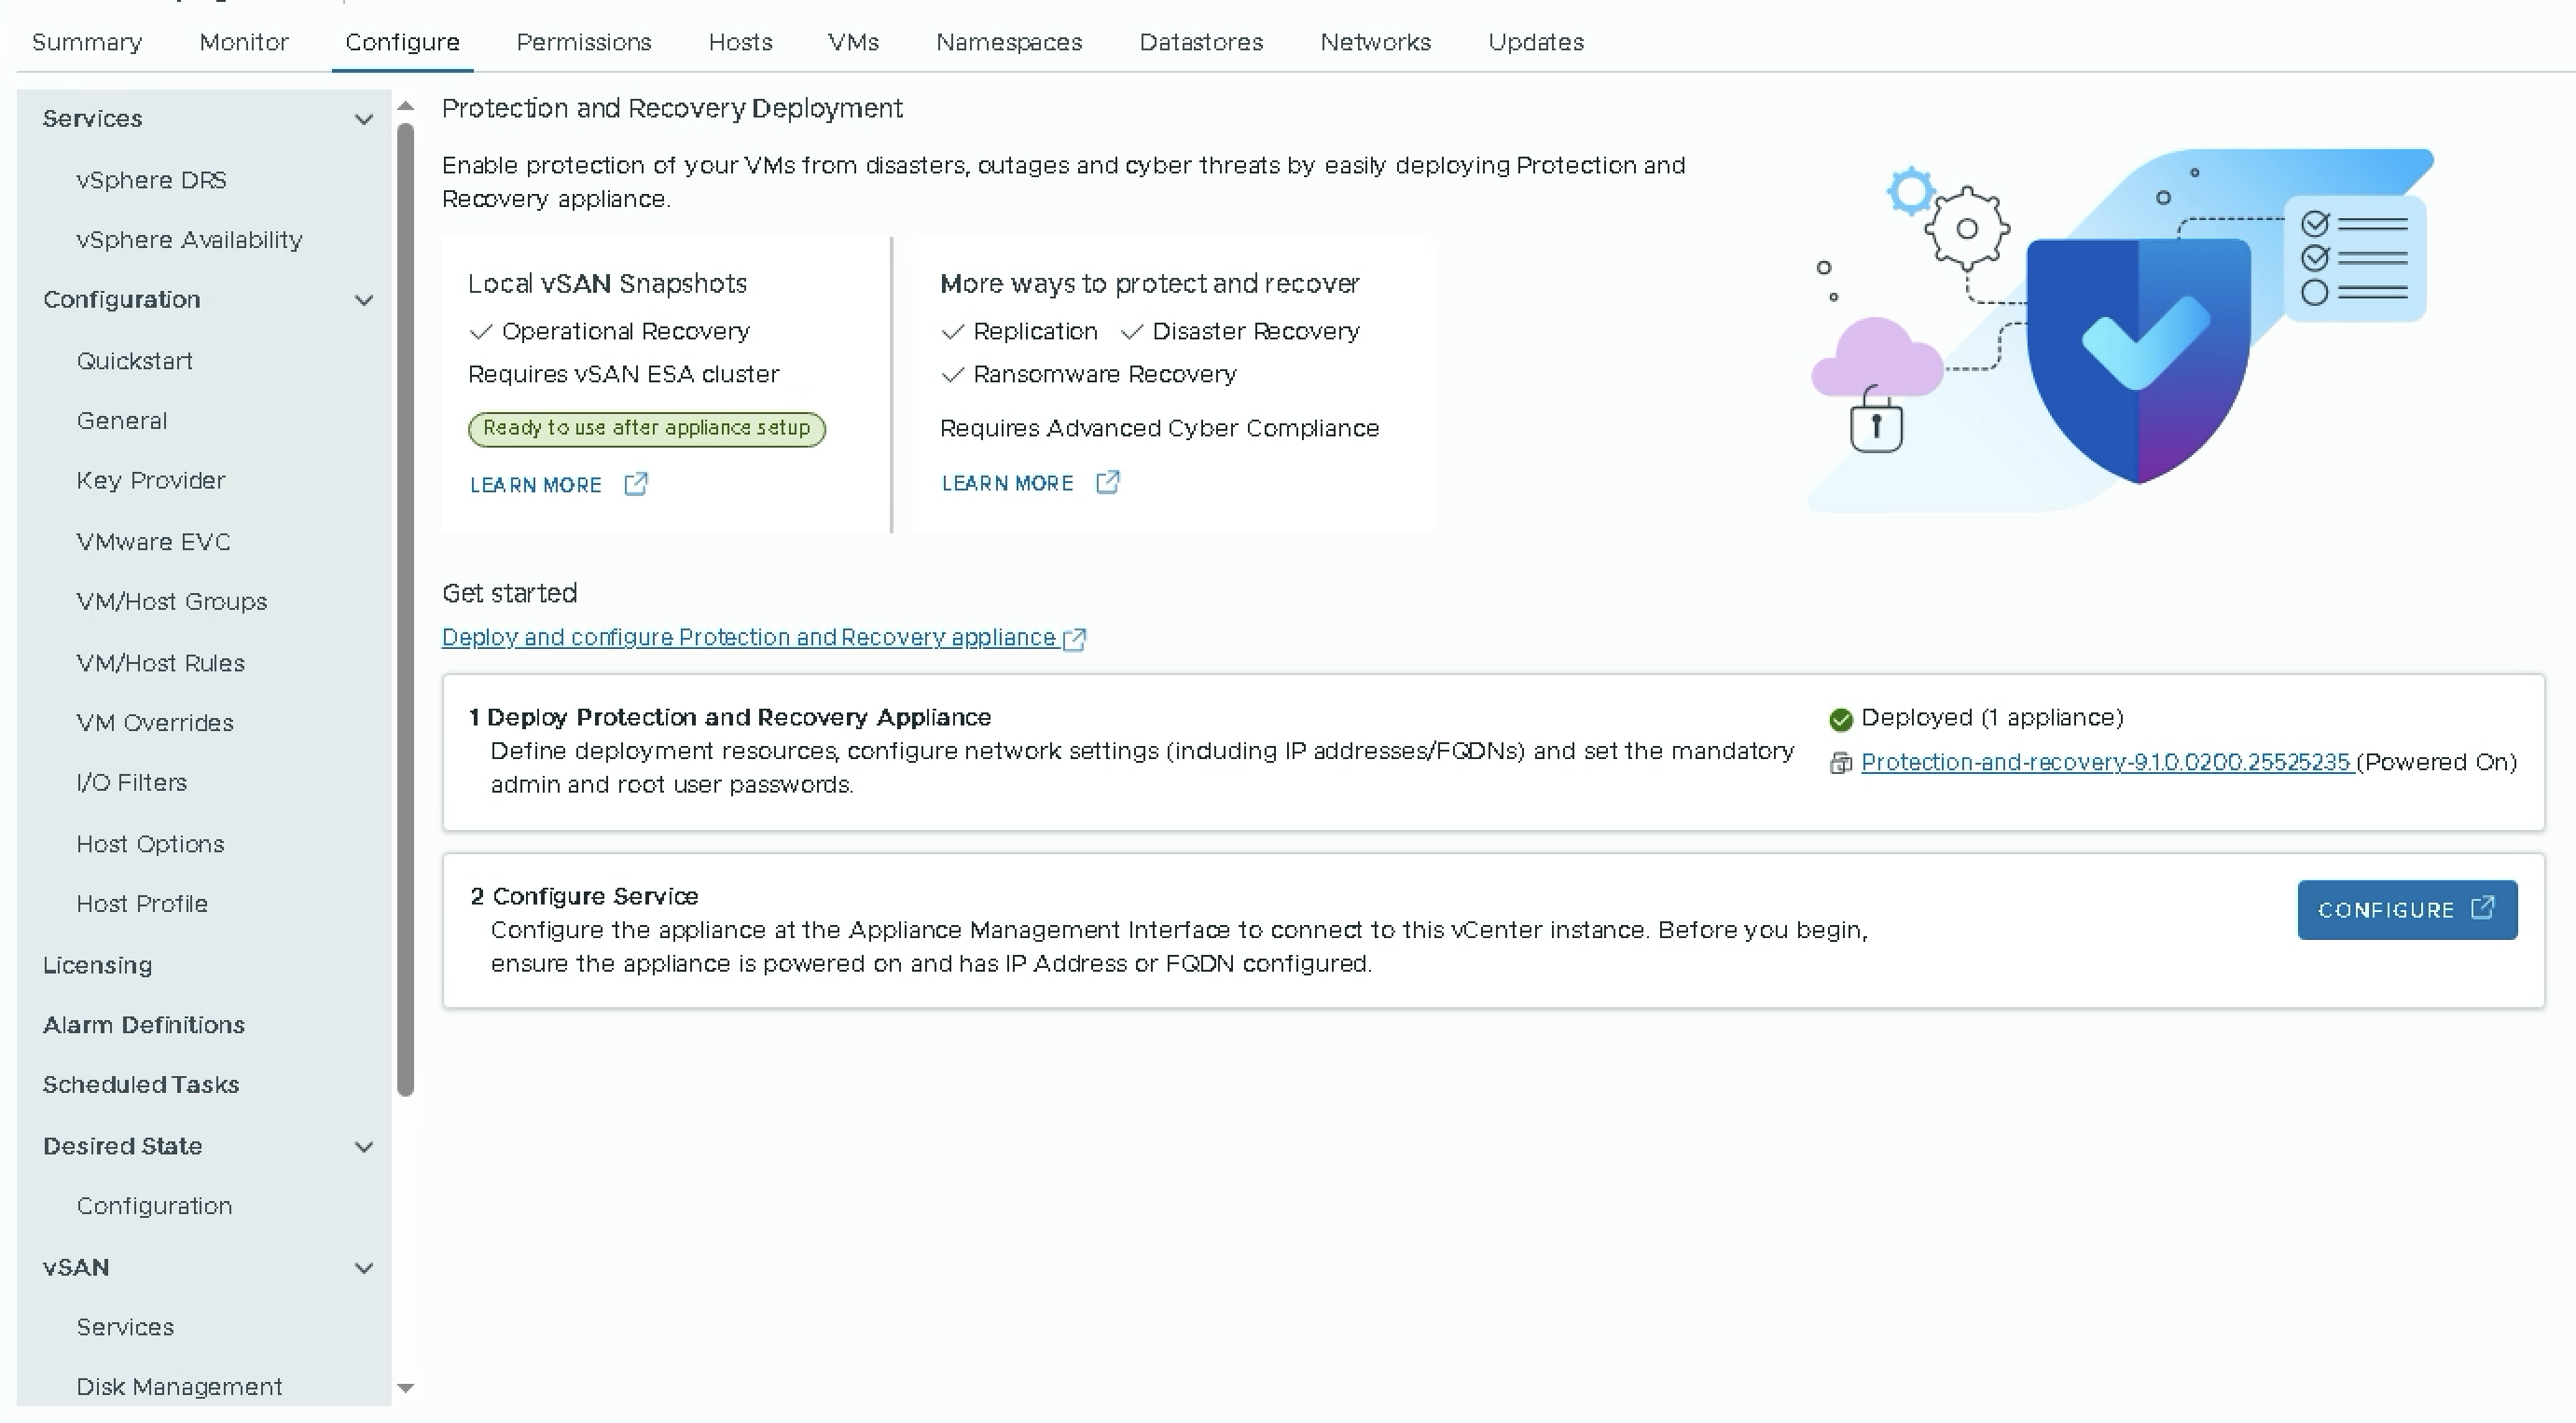
Once the deployment completes, you will see the appliance listed with its version — Protection-and-recovery-9.1.0.0200.25525235 — initially in a Powered Off state. The CONFIGURE button remains greyed out until you power on the appliance.
Power on the appliance. Once it finishes booting, the status changes to Powered On and the CONFIGURE button becomes active.
Option 2: Deploy Using the OVF Wizard (Traditional Method)
If you prefer the classic approach, download the Protection and Recovery ISO image and mount it on a system in your environment. In the vSphere Client, right-click a host, select Deploy OVF Template, point to the Protection-and-recovery-9.1.0.0.build_number_OVF10.ova file, and follow the wizard. You will configure the appliance name, destination folder, compute resource, datastore, network, and the deployment template (including SSHD, hostname, and admin/root passwords). Use FQDNs rather than IP addresses whenever possible — this gives you flexibility to change your VCF infrastructure later without redeploying the appliance.
Configuring the Appliance with vCenter
With the appliance powered on, the next step is connecting it to your vCenter instance. Click the CONFIGURE button on the deployment page, which opens the Protection and Recovery Appliance Management Interface in a new browser tab.
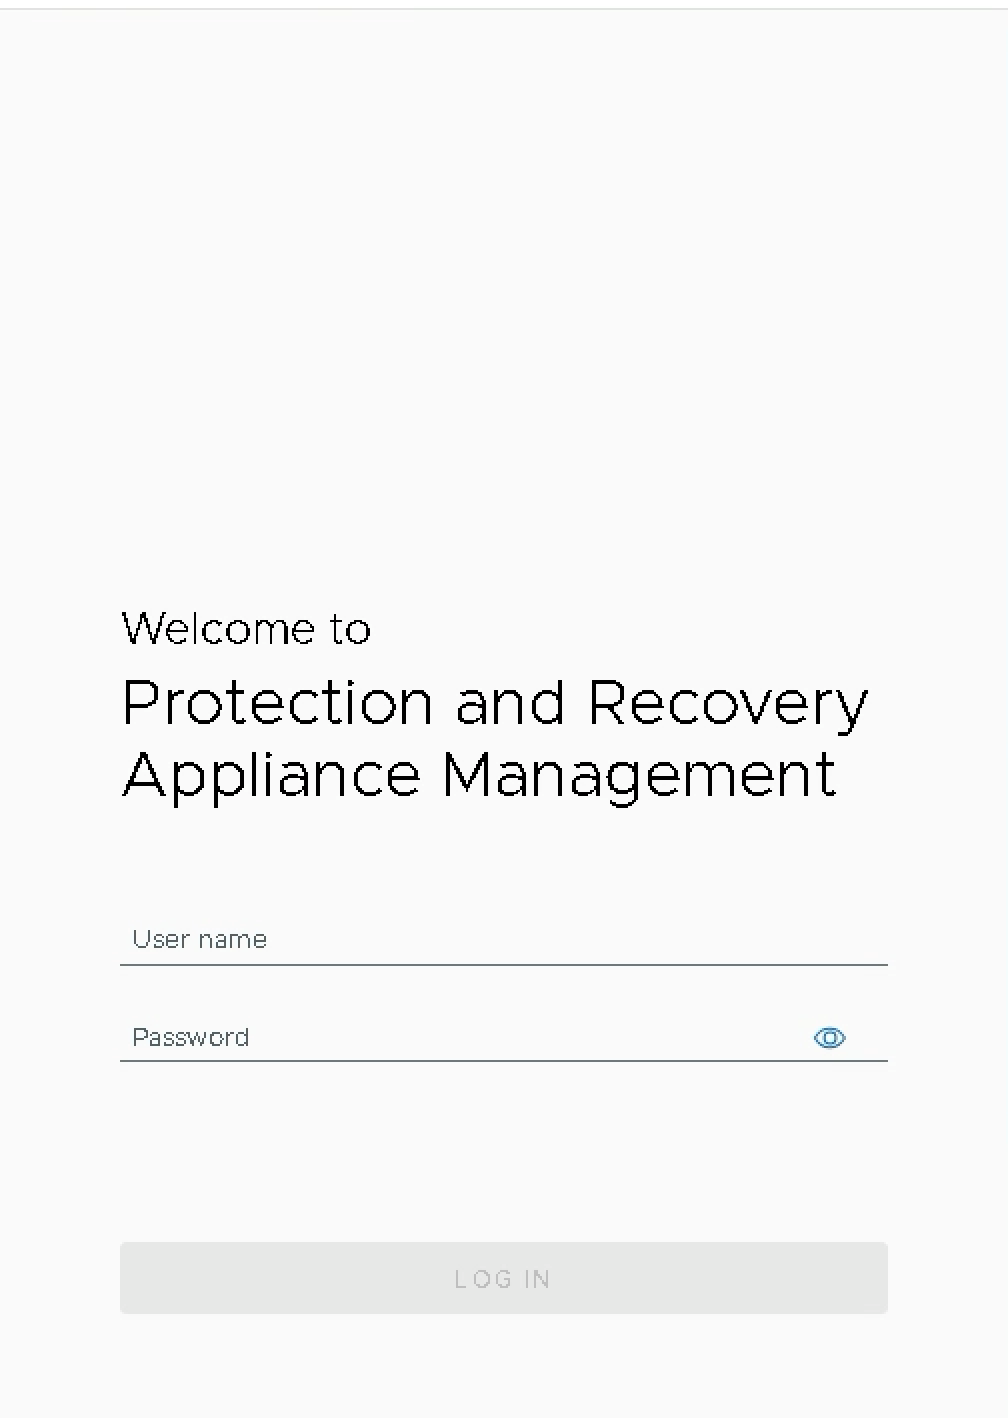
Log in as the admin user with the password you set during deployment. The Summary page shows the appliance details — product name, version 9.1.0.0200, and build number 25525235. You will see two options: CONFIGURE APPLIANCE for a fresh setup, and CONVERGE LEGACY APPLIANCES for migrating from older appliances.
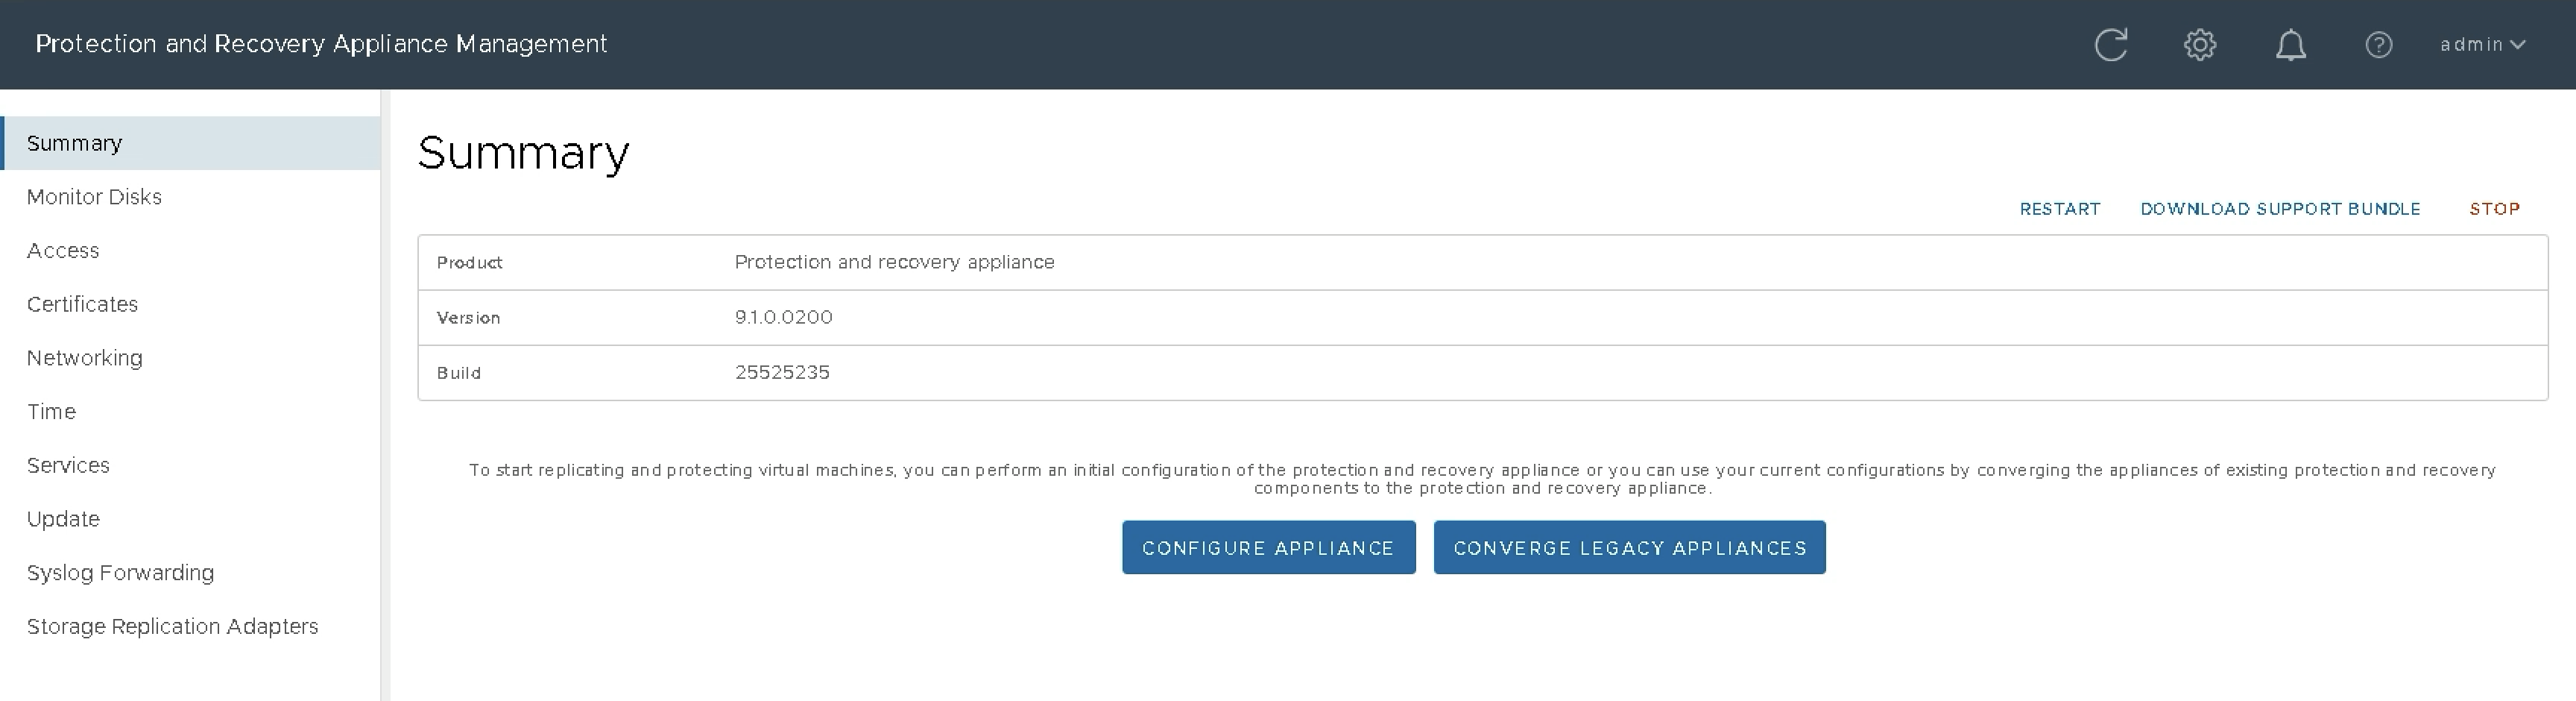
Click CONFIGURE APPLIANCE to launch the configuration wizard. The first step asks for the vCenter connection details — the vCenter hostname (FQDN recommended), port (443), SSO administrator username, and password. If prompted, accept the vCenter SSL certificate to proceed.
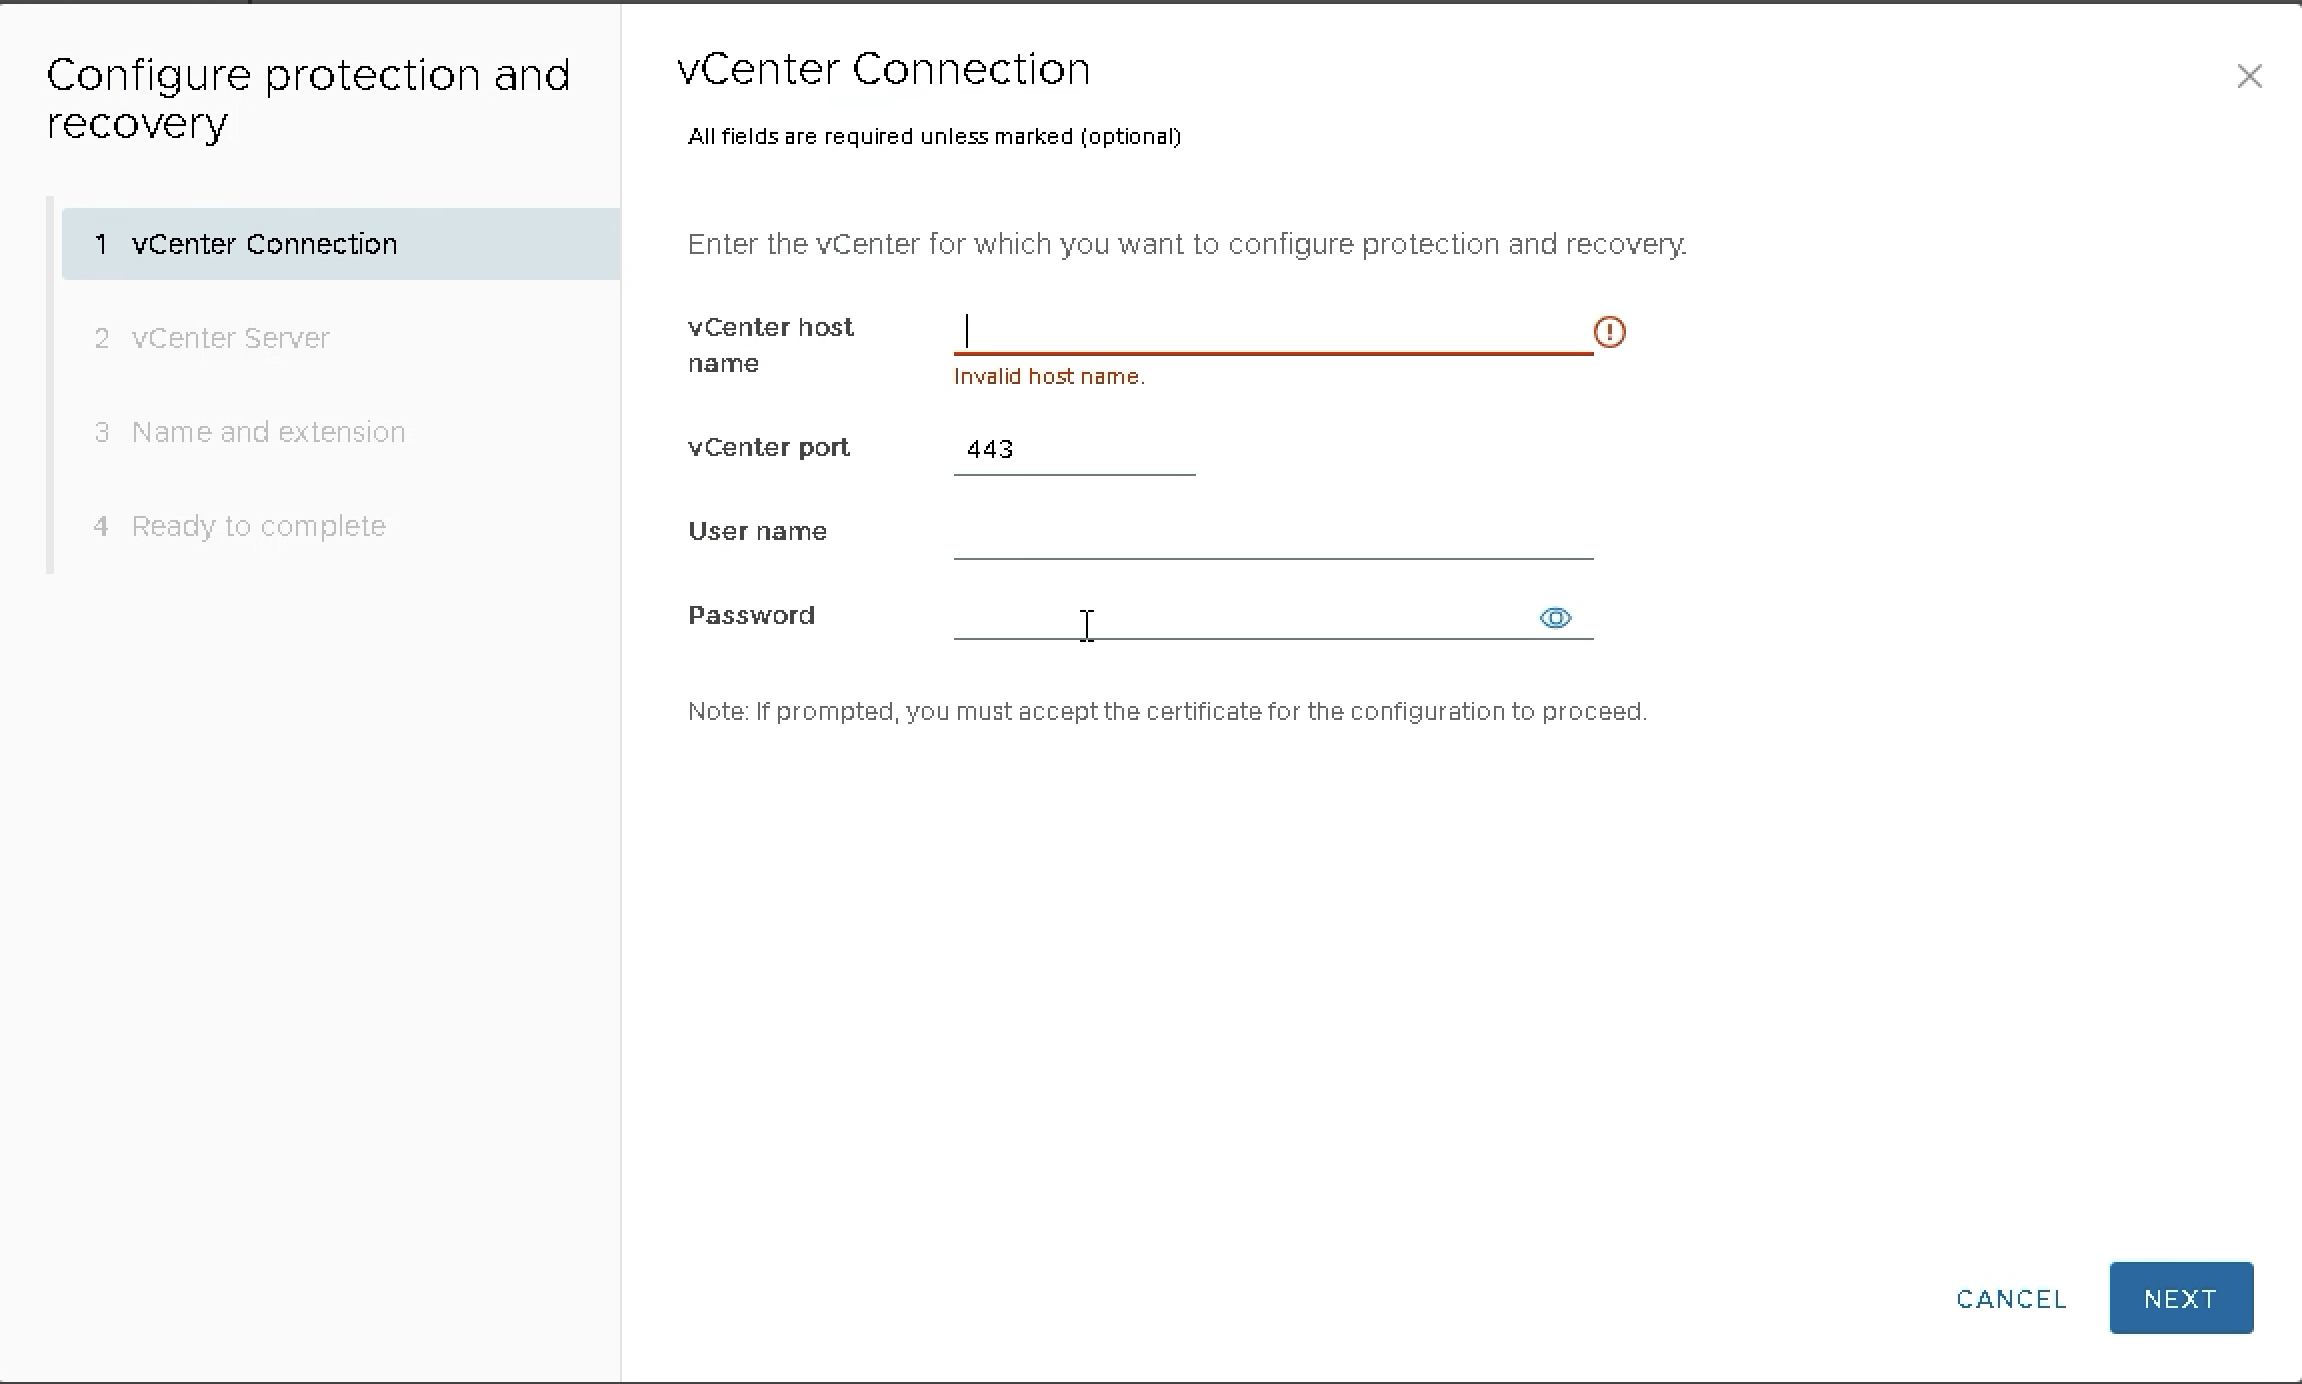
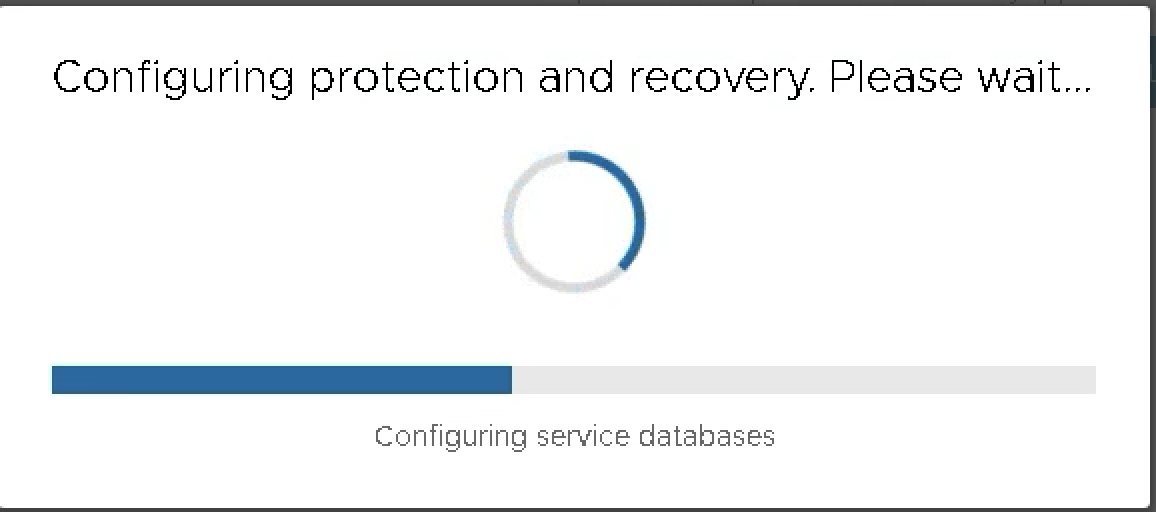
After entering the credentials and clicking through the wizard steps (vCenter Server verification, name and extension registration), the appliance begins configuring its service databases. This takes a few minutes.
When configuration completes, you get a clear SUCCESS notification — "Appliance configured." Click CONNECT TO PROTECTION AND RECOVERY to open the full Protection and Recovery interface in vCenter.

The Protection and Recovery Dashboard
Once configured, the Protection and Recovery section appears in your cluster's vCenter navigation under Configure > Protection and Recovery. The dashboard provides a Summary tab with two key panels.
The Overview panel shows your protection group count and a breakdown of protected versus unprotected VMs across the cluster. In a fresh deployment, you will see 0% Protected VMs — which is your starting point for creating protection groups.
The vSAN Snapshot Space Usage panel shows how much vSAN datastore capacity is consumed by snapshots versus other data, along with the free usable capacity remaining. An important safeguard is built in: scheduled snapshots will not be taken if the datastore capacity exceeds 70%, preventing snapshot growth from impacting production storage.
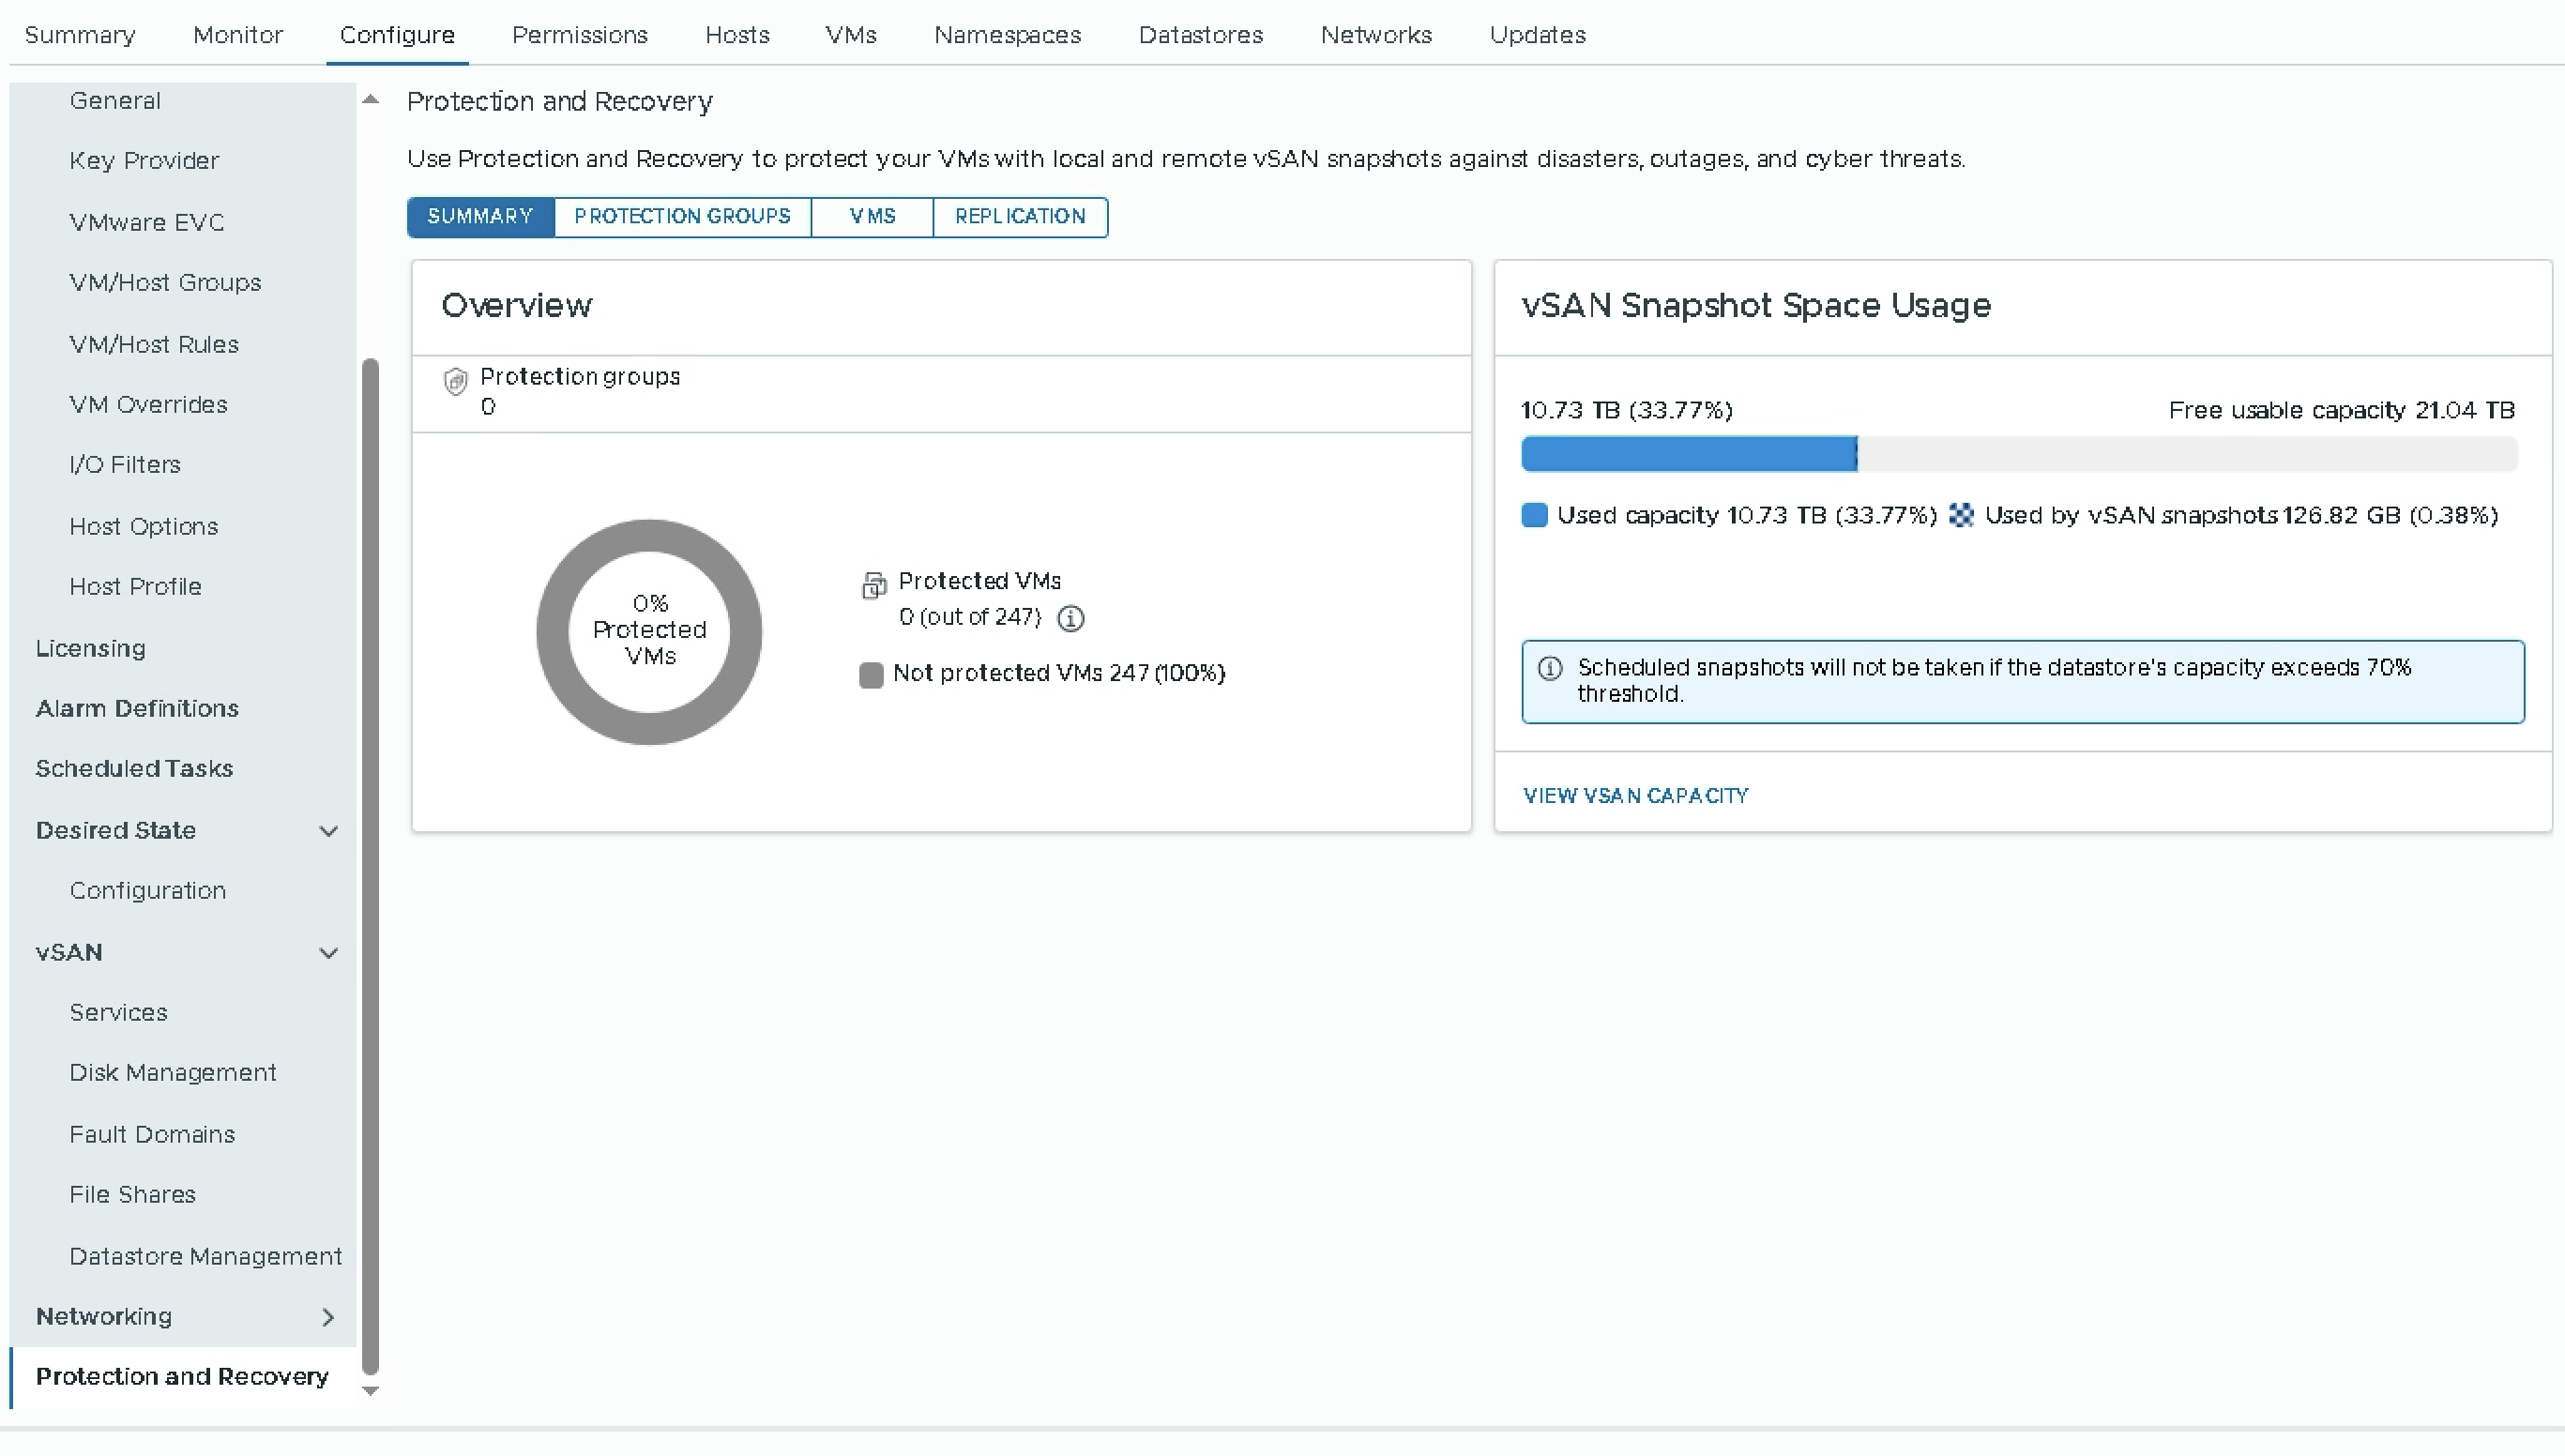
The dashboard also includes tabs for Protection Groups, VMs, and Replication — giving you a single pane of glass for all protection and recovery operations across the cluster.
Creating Your First Protection Group
Protection groups are how you define which VMs to protect and on what schedule. Navigate to the Protection Groups tab and click Create Protection Group to launch the wizard.
Step 1: General Settings
Give the protection group a name and select the protection type. For local vSAN snapshots, select Local protection — this is the no-license-required option.
The Immutability mode checkbox is worth noting. When enabled, you cannot edit or delete the protection group, change the VM membership, or edit or delete snapshots. This is a one-way setting — once immutability is enabled on a protection group, it cannot be disabled through the UI. This provides tamper-proof protection against both accidental changes and ransomware attacks that try to delete recovery points.
For VM membership, you have three flexible options that can be combined: Individual VM selection (manually pick specific VMs), Dynamic VM name patterns (automatically include VMs matching naming patterns at each snapshot), and Tags (automatically include VMs with specific vCenter tags at each snapshot). The dynamic options are especially powerful in environments where VMs are created and destroyed frequently — new VMs matching the pattern or tag are automatically protected without manual intervention.
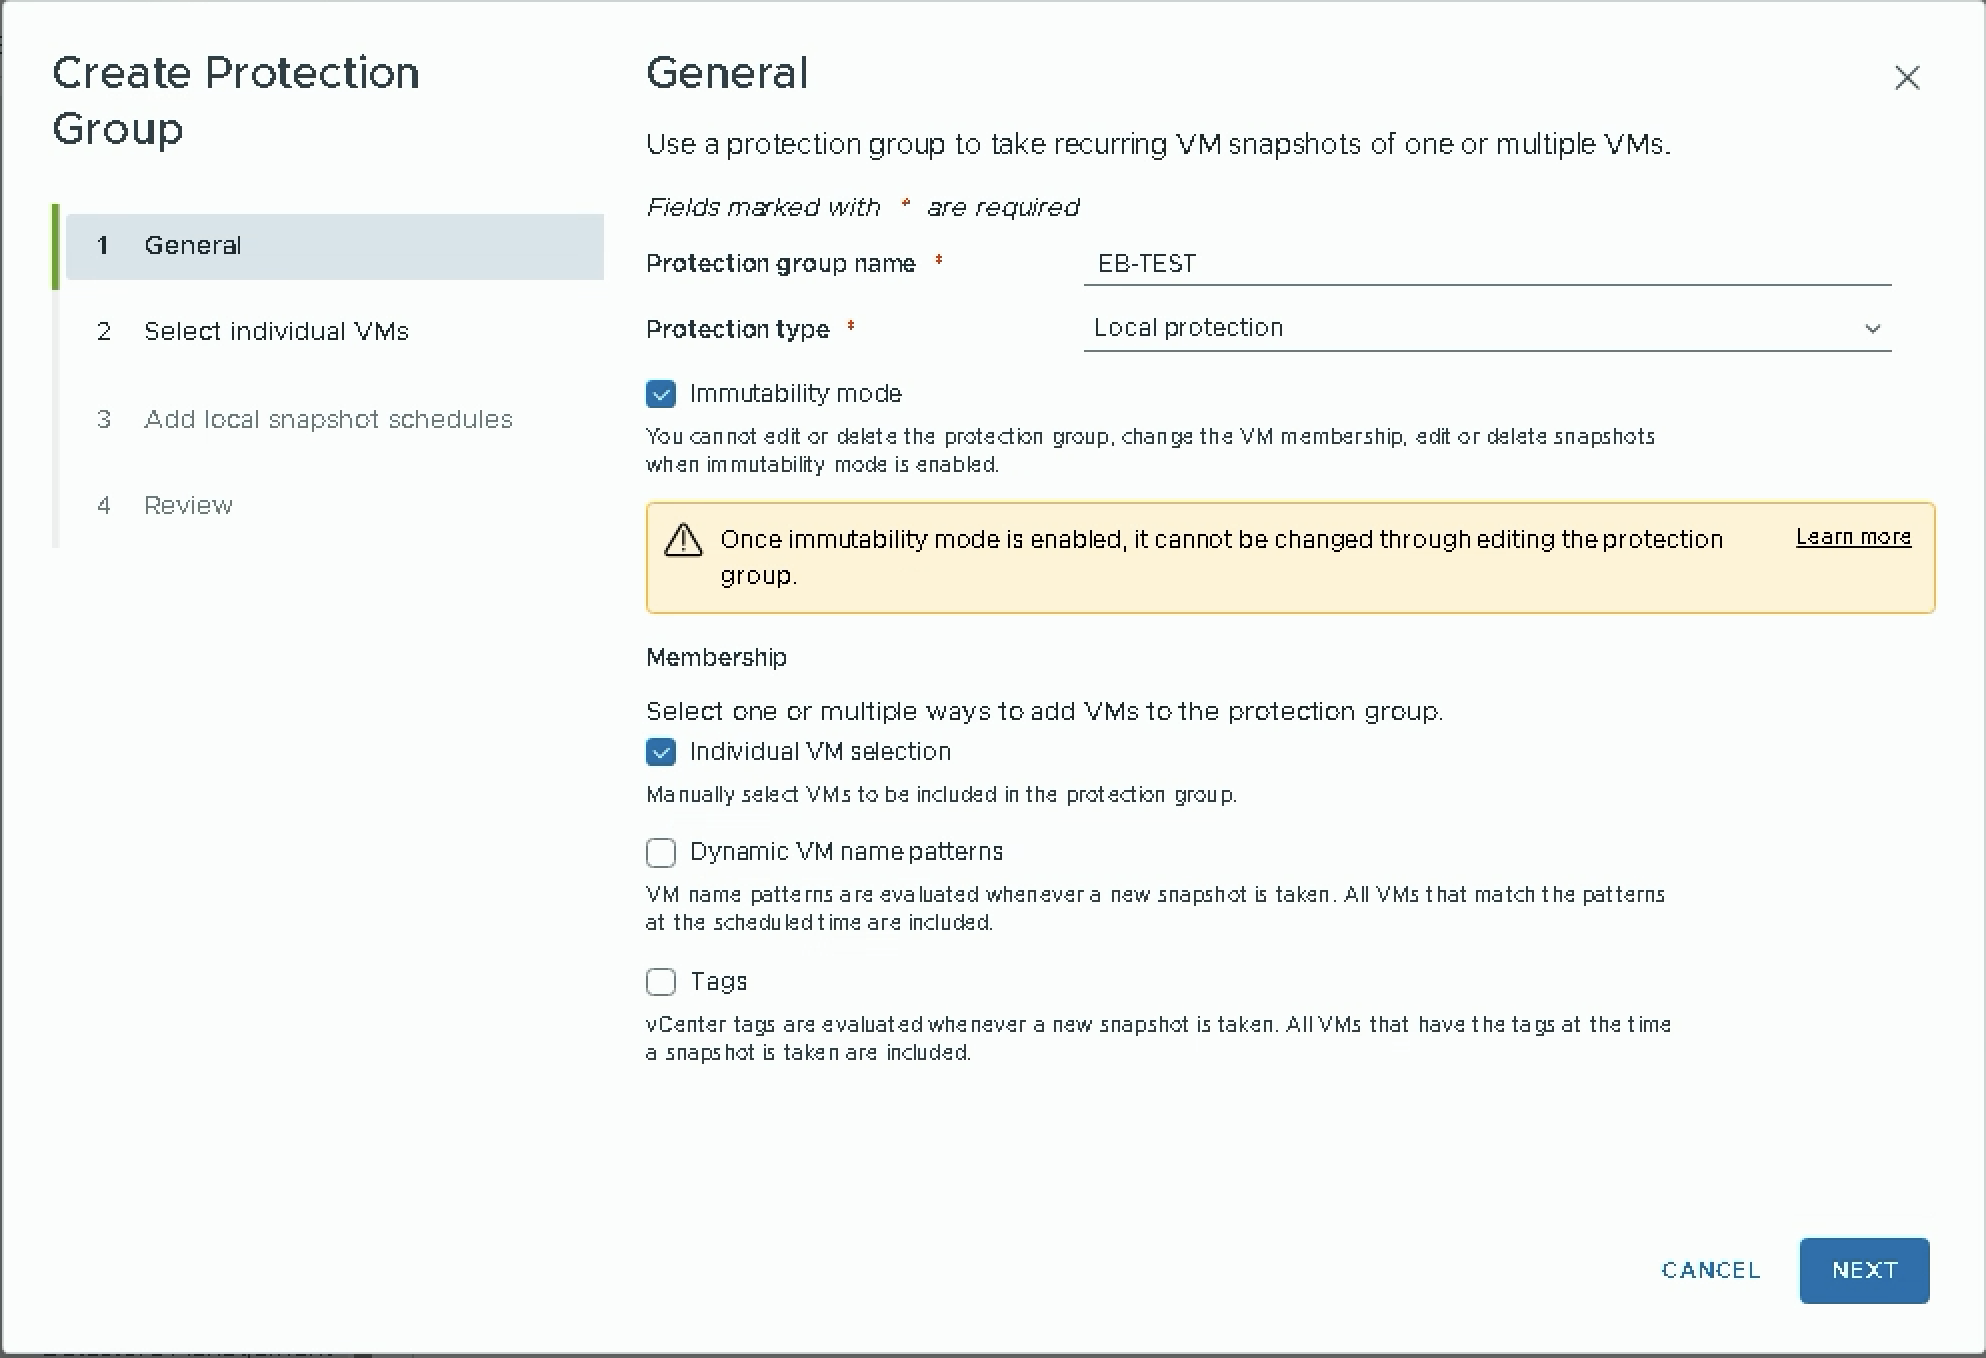
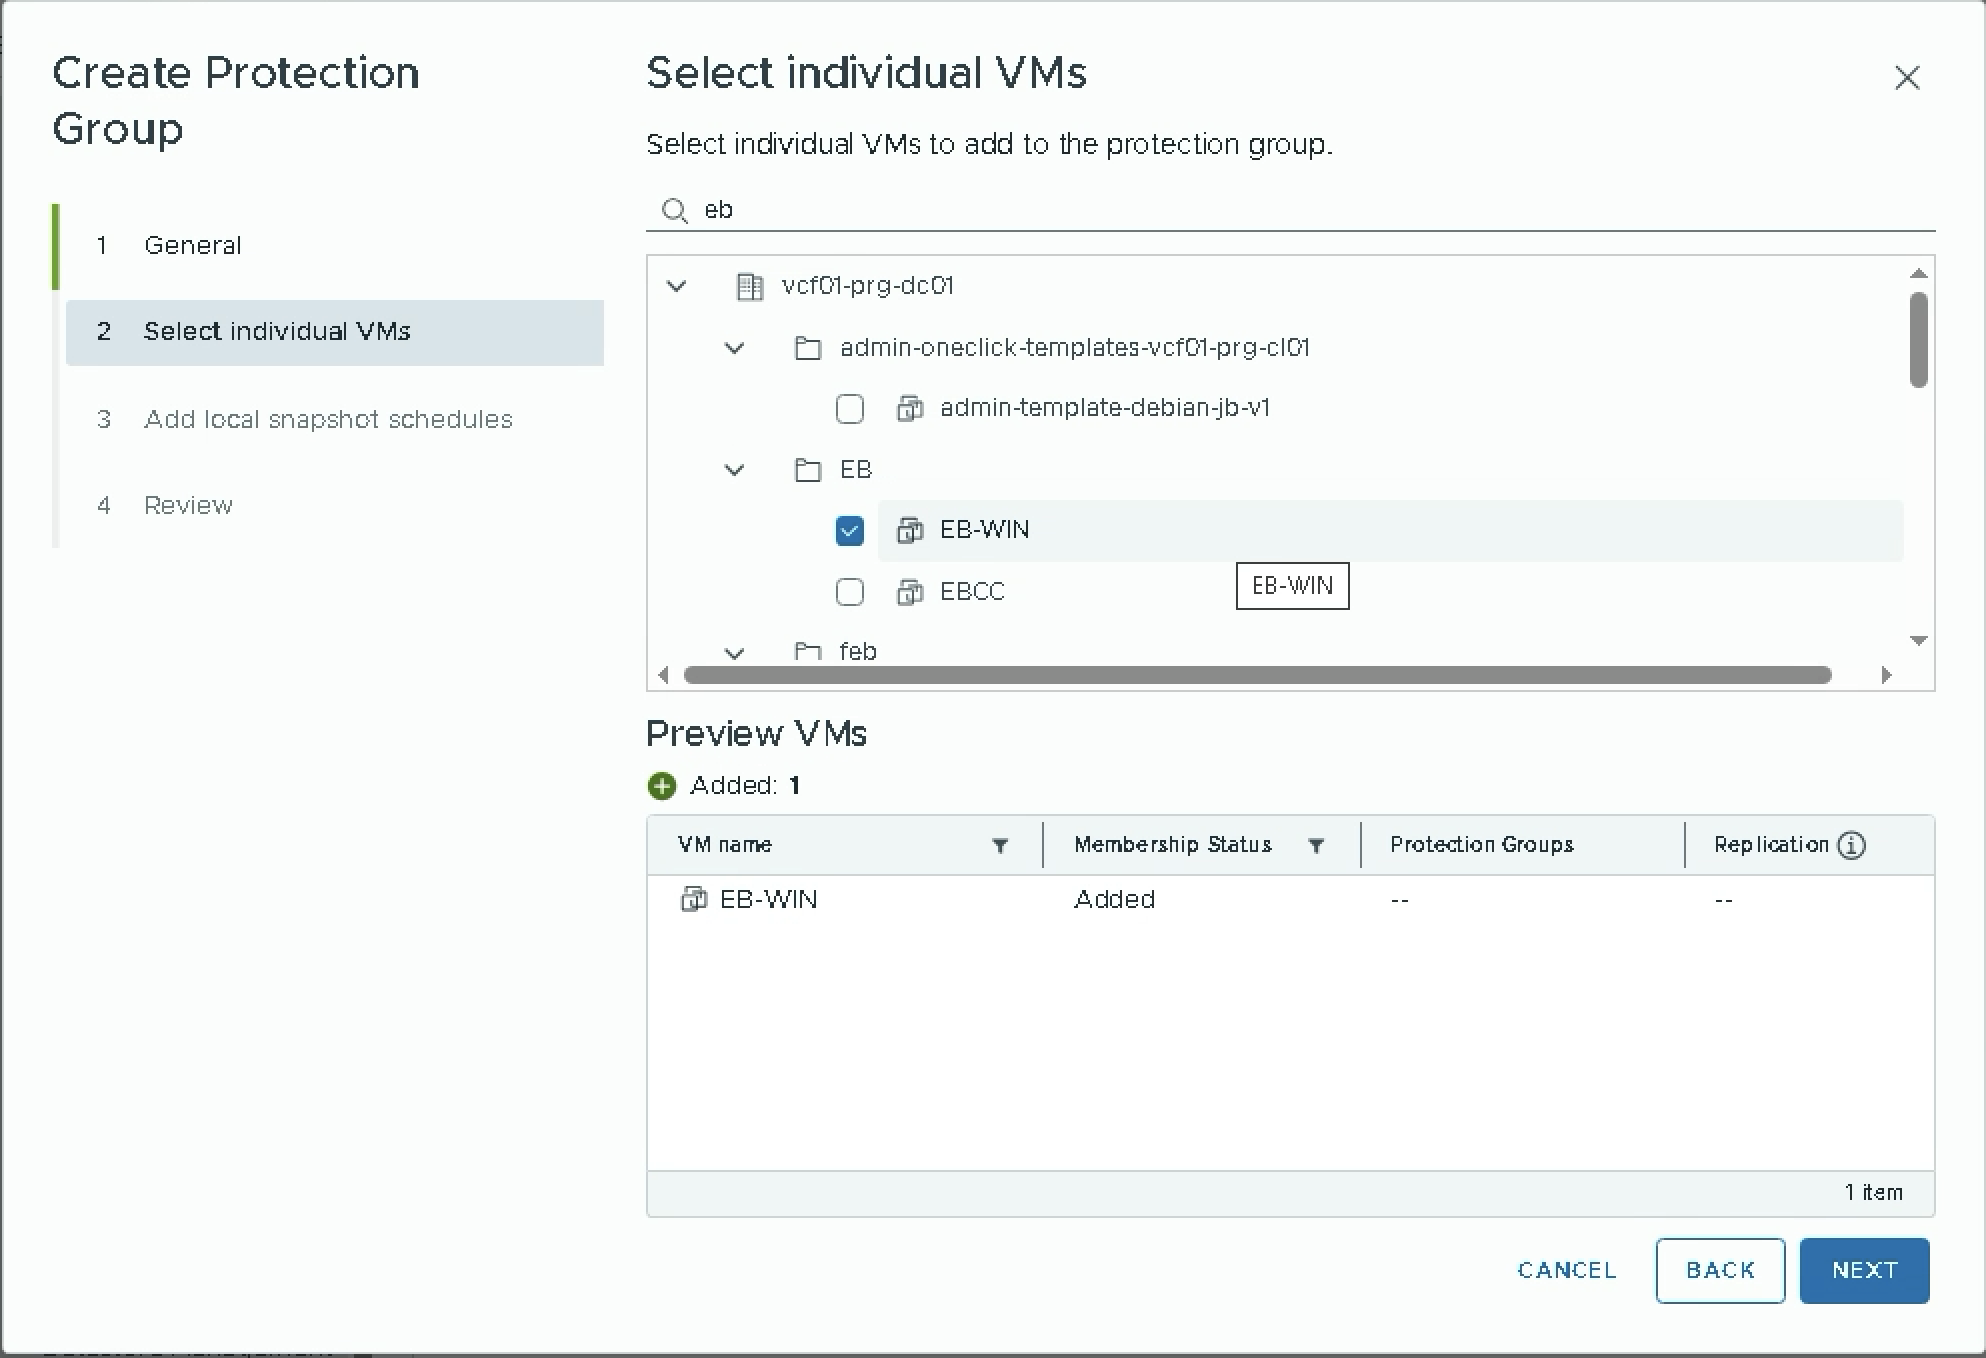
Step 2: Select VMs
If you chose Individual VM selection, you will see a tree view of your datacenter inventory — folders, resource pools, and individual VMs. Search or browse to find the VMs you want to protect, select them, and the Preview VMs panel at the bottom confirms what will be added.
Step 3: Snapshot Schedule
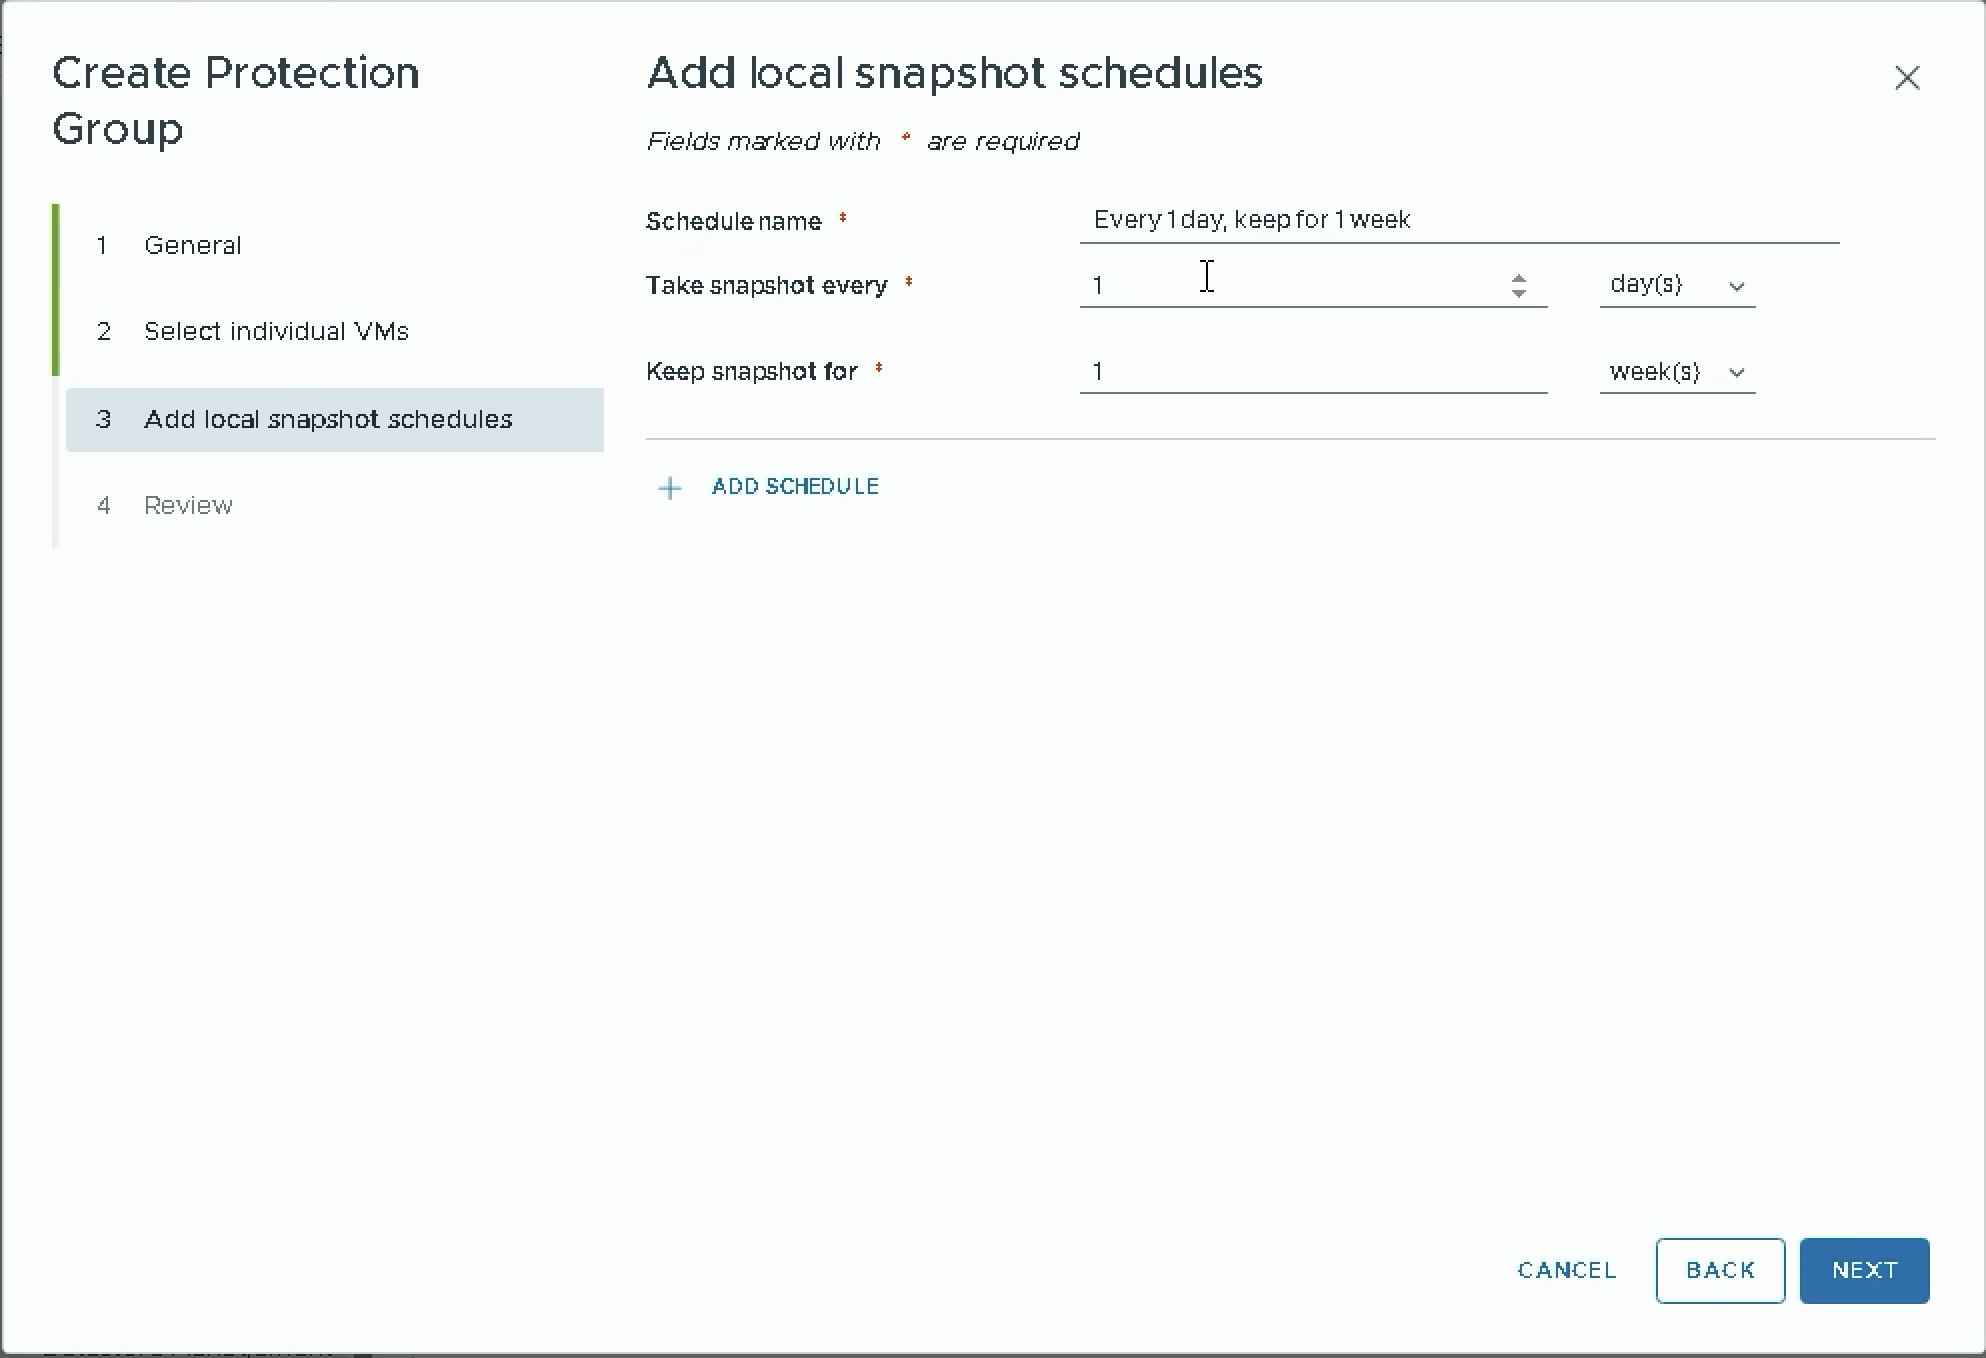
Define your snapshot frequency and retention. Set a schedule name, how often to take a snapshot (every N minutes, hours, days, or months), and how long to keep each snapshot. You can add multiple schedules to the same protection group — for example, hourly snapshots retained for 24 hours plus daily snapshots retained for 30 days.
Step 4: Review and Create
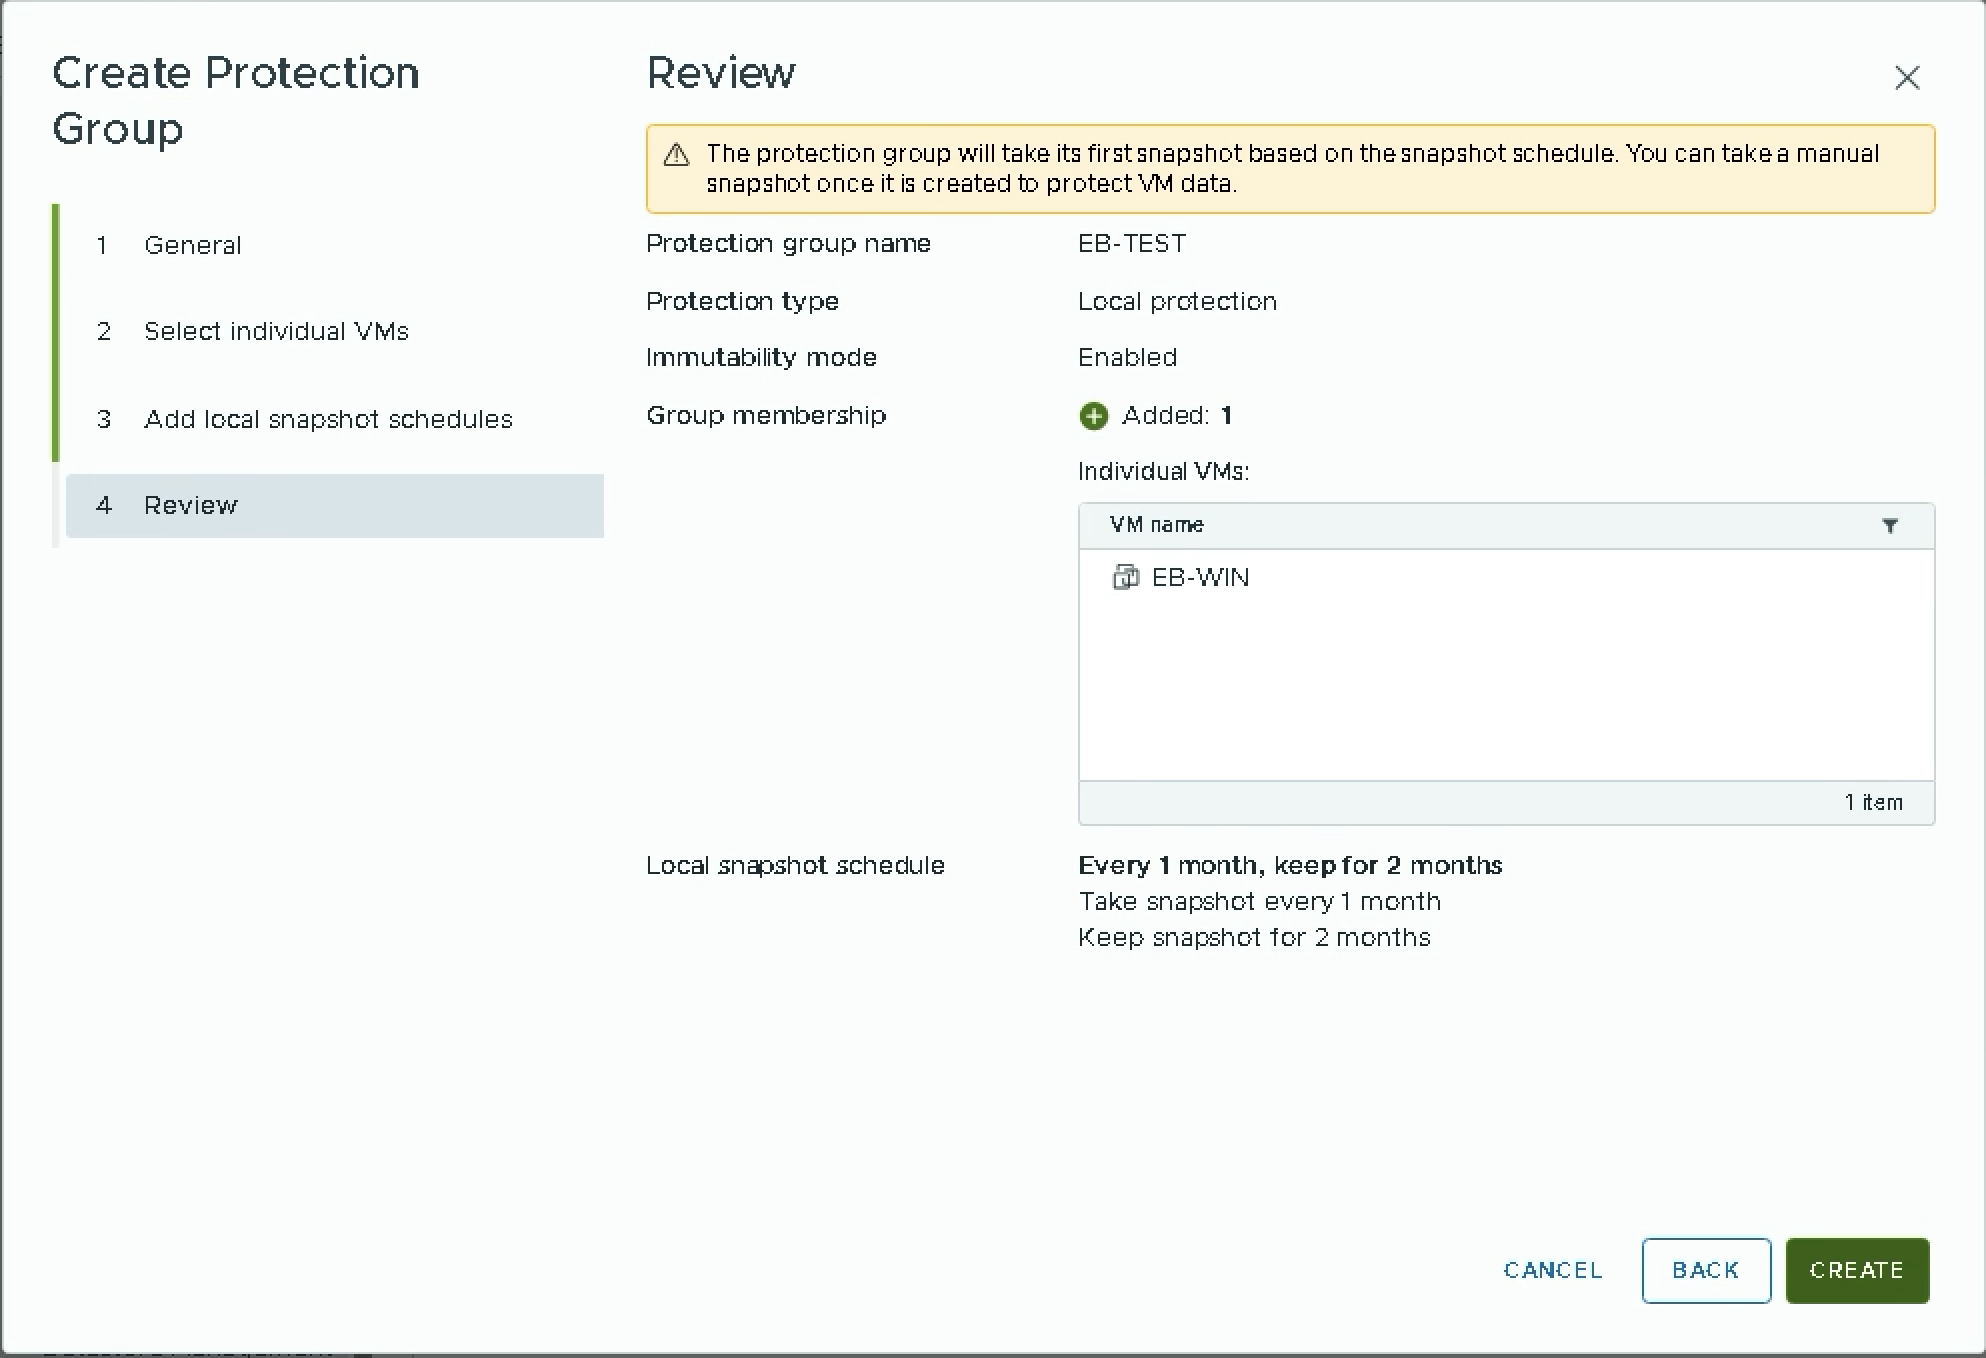
The final step shows a summary of your protection group configuration — name, type, immutability setting, group membership, and the snapshot schedule. Review the settings and click CREATE. The protection group takes its first snapshot based on the configured schedule, or you can trigger a manual snapshot immediately after creation.
Converging Legacy Appliances
If you are running VMware Live Site Recovery, vSphere Replication, or vSAN Data Protection as separate appliances from earlier versions, VCF 9.1 provides a convergence workflow to migrate everything into the new unified appliance. This preserves your existing configurations — site pairs, replication settings, protection groups, and recovery plans — so you do not have to rebuild from scratch.
Prerequisites
Before starting the convergence, verify that your environment meets these requirements: your ESX hosts must be running version 8.0 U2d or later (or 8.0 U3b or later), and vSAN Data Protection requires ESX 9.0 or later. Your existing VMware Live Site Recovery and vSphere Replication appliances must be at version 9.0.2.2 or later. If you are on vSphere Replication 8.7.x, you need to upgrade to 8.8.x first, then to 9.0.2.2 before converging. SSH must be enabled on all legacy appliances, and the new Protection and Recovery appliance must have network access to each of them. Deploy the new 9.1 appliance on both the protected and recovery sites before starting convergence.
The Convergence Workflow
The process runs entirely from the new appliance's management interface:
1. Open the Protection and Recovery Appliance Management Interface at https://appliance-IP-or-FQDN and log in as admin.
2. Click CONVERGE LEGACY APPLIANCES (visible on the Summary page alongside the CONFIGURE APPLIANCE button).
3. Enter the credentials for the vCenter where the source appliances are registered. If prompted, accept the certificate.
4. Select the vCenter, click List services to converge, select the services you want to migrate, and click Next.
5. Enter the credentials for each legacy appliance you are converging and click Finish.
6. Run the Configuration wizard to confirm your current configuration settings.
7. Repeat the entire procedure on the recovery site.
When convergence completes, the old appliances are powered off automatically. The old IP addresses and FQDNs of Live Site Recovery, vSphere Replication, and vSAN snapshots and replication are discarded and replaced by the new Protection and Recovery appliance's address.
After convergence, clean up your old firewall rules, DNS records, and IP reservations. If you were using array-based replication, reinstall the SRAs in the new appliance and re-enter your array credentials. If you were using Virtual Volumes, re-register the VASA providers. User-defined permissions that referenced old vSphere Replication or vSAN snapshots roles need to be recreated, as the role names have changed in the unified appliance.
What You Get Without a License
This is worth emphasizing because it changes the protection calculus for many organizations. With the Protection and Recovery appliance deployed on a vSAN ESA cluster, you get local vSAN snapshots at no additional cost. That means:
Scheduled snapshots — automated, policy-driven snapshots at intervals you define (minutes, hours, days, or months) with configurable retention periods. No manual intervention required.
Protection groups — organize VMs into logical groups with individual selection, dynamic name patterns, or vCenter tags. New VMs matching your criteria are automatically included.
Immutability mode — lock down protection groups so snapshots cannot be deleted or modified, providing tamper-proof recovery points.
vSAN Snapshot Space Usage monitoring — real-time visibility into how much datastore capacity snapshots are consuming, with automatic safeguards at 70% capacity.
Instant restore and linked clones — recover VMs from snapshots or create linked clones for testing and development directly from the Protection and Recovery interface.
This is operational recovery — the ability to quickly roll back a VM to a known good state when something goes wrong. It covers the scenarios that happen most frequently: accidental file deletion, failed patches, application corruption, misconfigurations. For many environments, this level of protection is exactly what is needed, and it is included with the infrastructure you already have.
The Bottom Line
The Protection and Recovery appliance in VCF 9.1 is a well-executed consolidation. Three appliances become one. Deployment takes minutes, not hours. Configuration is a four-step wizard. And local vSAN snapshots — the protection capability that every environment needs — come at no additional license cost.
For organizations already running VCF with vSAN ESA, there is no reason not to deploy it. The resource footprint is reasonable (8 vCPUs, 24 GB RAM), the operational overhead is minimal (one appliance to manage instead of three), and the protection is immediate. For organizations running legacy Live Site Recovery and vSphere Replication appliances, the convergence path preserves your existing configurations while simplifying your infrastructure.
Protection does not have to be complicated. With VCF 9.1, it is not.
References:
Discussion
No comments yet. Be the first to start the discussion.